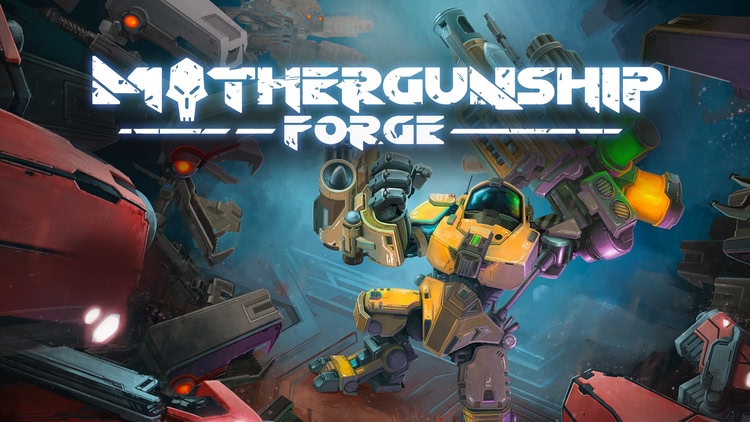
MOTHERGUNSHIP: FORGE is a frantic VR FPS roguelite with one of the most intuitive and empowering crafting systems ever created. Now updated for Meta Quest 3 to look ever better!
Survive the MOTHERGUNSHIP’s metal minions and earn gun parts to add to your weapon, easily snapping them into place in VR.
Choose from hundreds of parts that influence not just you and your gun, but also change your enemies and the world around you.
Face off through four biomes, each with a massive boss, and unlock tons of new gunparts and modes.
"Incredibly well-made... one of the best VR shooters out there.” —Android Central"
"One of the best VR bullet-hell games I’ve experienced..." —cogconnected"
Meta Quest 3 Updates include: higher resolution, new post effects (including Bloom, HDR, and Tonemapper), sharper resolution textures, improved framerate, and dynamic resolution scaling for a higher --and steadier-- performance.
Quest 2 and Quest 3 versions both include all free post launch content including full Co-Op Campaign, Terror, Iron Man, Sandbox, and Custom Modes, Meta Quest 3/ Meta Quest 2 cross play, hundreds of gun parts, seasonal events, new weapons, levels, bosses, and more!
| comfort | ⦾ Comfortable |
| age rating | 10+ Everyone |
| storage | 1.7 GB |
| website | terribleposture.com |
| developer | Terrible Posture Games, Inc |
| publisher | Terrible Posture Games, Inc |
| connection | Internet not required |
| app version | 1201 |
| languages |
English ∙ Chinese ∙ French ∙ German ∙ Italian ∙ Japanese ∙ Korean ∙ Spanish
|
It's fun and I like thr graphics but I can't seem to build a gun on each hand?? My left trigger never fires even though I build a gun. And I can't see if all my guns on my right hand are firing as its only ever one bullet?
Barrels-
Death Ray: A powerful gun. Rarities: Legendary only. Info: A weapon with a reactor
pointing forwards. There are four L-shaped parts that come out of the sides of the weapon that form a + shape from behind. These L parts also bend for the idle animation. It has a cooldown of 10 seconds, and a charge-up of 5 seconds. It also has neutralize built in. It also cannot have its firerate increased AT ALL. Projectile: A massive (even larger with mega cap) red beam that lasts for 3 seconds and has a DPS of 1000. The beam can also be canceled, as it is required to hold down the trigger to keep the beam firing for the full 3 seconds.
Particle Accelerator: A gun with a unique projectile. Rarity: Rare or higher. Info: Has bounce built into it. Cannot fire again until the projectile has hit the target or disappeared. Projectile: Two white orbs that spin around each other. They spin faster the longer they have existed and deal more damage the faster they spin. Eventually, they end up crashing into each other after existing for long enough (not when they hit an enemy though) and explode.
Soundwave Blaster: A gun that shoots sound. Rarities: Uncommon or higher. Info: Has piercing and deflect built in. Can stun enemies. Has a cooldown of 1.75 seconds. Projectile: A sound wave which is hard to see and is also quite fast. It also starts to deal less damage after existing for long enough.
Portal Gun: A gun that shoots portals. Rarities: Legendary only. Info: A weapon with a blue orb within a (possibly) glass jar connected to a spinning barrel. Deals no damage by itself, but quite useful if used correctly. When used, it shoots a portal. Any enemies or projectiles that get close to the portal get sucked into it, but not killed. When used again, it shoots another portal that shoots any projectiles or bombots absorbed by the first portal at nearby enemies, and launches any non-bombot enemies out once it hits something. Bounce does not affect the second portal, but can affect the first one. After shooting a second portal, it will shoot the first portal once the second hits something.
bobgun: the strongest weapon. Can only be used by devs or people given the ability to use it. Info: Looks like a normal blaster, but when used, it shoots a ridiculous amount of Oblivigun bullets per 0.1 second that deal 100000 damage each. It has the Mega cap’s ability built into it, because why not? Like I said, the bobgun can only be used by developers or people given the ability to use it since it is this overpowered.
Caps-
Discoverer’s cap: A legendary cap that looks like a magnifying glass. It gives 4 luck upon equipping it and also slightly increases the chance of getting an unlocked item that hasn’t been obtained yet while slightly decreasing the chance of getting obtained items (including itself).
Drill: A melee weapon that is common in the Mineshaft Zone (more on that later). Can deal damage by stabbing, but deals more damage if holding trigger where it starts drilling. Can instantly destroy force fields if needed.
Shielding Shield: A legendary shield that has 1 hit before it gets disabled. However, as weak as it sounds, it has a unique capability that makes it extremely powerful: it gains one extra maximum hit amount for each piece of armor you collect. Of course, I would add a weakness to something like this. Every hit amount you gain from armor can only be used once. Let’s say you have a max of 6 hits on a shielding shield. If your shield gets hit 5 times, the max goes back to one. It can have its maximum hit count increased by caps, but armor gives it a single use increase of maximum hits it can take.
the muncher: Yes, there are no capital letters in it’s name. A legendary melee weapon that looks similar to the Silver Teeth cap, but the teeth pointing forward. It deals damage when trigger is pressed. It deals 3500 damage per bite and has neutralize built in. Instantly destroys any forcefield it touches when trigger is pressed. Also gives one health when any type of Staplehound is killed with it.
Enemies-
Tankhound: A variant of the Staplehound that is larger and has much more health, having 8000 health, but it moves slower (taking 1.25 seconds to take one step) because of all the armor it wears, giving you more time to kill it. Appears during later areas in normal runs, and becomes more common the harder it gets in endless mode.
Speedy Bombot: A smaller bombot that moves in a zigzag and also is much faster, but stops moving when the player is in its range. It has one point of health and has a smaller explosion, but is still just as dangerous as a regular bombot. Appears after the first boss fight.
Staplehound Omega: Largest walking enemy on the list and in the game if it gets added. Huge Staplehound that is black in color and has a TON of health, having 15000 health. However, due to its size, it takes 3 seconds for it to take a single step. This means it takes longer for it to reach you, but if it does, it instantly kills you unless you have one piece of armor or the crystal ball cap. It also only appears on endless mode and on the secret zone, but it can only take routes where no ramps are required to reach you, as it cannot go up or down ramps. If the only way to reach you is a ramp, it cannot appear. It also can only appear once per level to not overwhelm players with lots of them.
Spike Launcher: A type of turret that shoots a spike. And I mean the same spikes that are shot by the final boss and by the secret boss. It only appears on the final boss’s zone, the secret zone, the Mineshaft Zone (more on that a teeny tiny bit later) and on endless mode. It has a bit more health than the giant red turret. It also has a large cooldown.
The Boomer: A large sphere with legs and a cannon. Has 10000 health in its first phase and 5000 in its second. In its first phase, it stands still and uses its cannon to shoot explosives at you. After its health reaches 0, it heals to 5000 health and starts walking towards the player while shooting you with its cannon. It also has a forcefield in its second phase. When it gets close enough to the player, it becomes invincible and explodes, killing both itself and the player. It’s self destruction also ignores armor and will kill the player unless they have the Crystal Ball cap. Only appears in the Secret zone and above. Can only appear once per three levels or so.
Bosses and zones-
Mineshaft Zone: A dark zone where walking enemies, especially drillhounds (the walking enemies with a built in force field and drills) are quite common. The flying buzzsaw bots are also common here. Hard to see sometimes because of the darkness, but most of the time you can see. Like the secret zone with the pink spikes, this zone becomes available after defeating the final boss as an area unlockable with a key.
The Collector: The boss that comes at the end of the Mineshaft Zone. Can throw rocks at you, shoot spikes and lasers, and also launches drills at you. It also has hands that it uses to throw rocks and shoot drills from. Cannot take damage until it runs out of energy for a bit, where the four forcefield generators on its head become vulnerable. After one has been destroyed, it retreats to the underground for a bit while floating buzzsaw bots attack you, platforms come from the ground and drillhounds start attacking you. Once all enemies from this have been destroyed, the Collector comes back to fight again. After all four forcefield generators have been destroyed, the large power source bulb on the top of it’s head becomes vulnerable, and once this is destroyed, the Collector stops working and falls into the abyss of the chasm below before dying in a massive explosion.
The Storage Zone: Like the secret area with the pink spikes, all rooms here are challenge rooms. Comes after the Mineshaft Zone as an option along with Exit. Enemies here are quite hard. Gun part rooms and shops are more common than other rooms.
The Resource Guardian: Quite the unique boss. Comes at the end of the Storage Zone. Moves around much more than other bosses, as it will be climbing, running, hopping and dodging during the boss fight. Did I mention that the boss area is a flat floor with two piles of storage containers? Anyways, unlike other bosses, IT WILL ACTUALLY USE THE SAME GUN PARTS AND BARRELS THAT THE PLAYER CAN USE. It often makes powerful weapons with the gun parts it finds in the storage containers. It can also summon enemies as well. It also will not stop trying to fight the player, and gains no I-frames during any part of the fight. Upon defeat, it will collapse to the ground and explode, with the rewards being gun parts and lots of purple shards.
Forge Zone: The forge itself. Comes at the end of the Storage zone as an option. Here, only Gun part rooms can spawn.
The Blacksmith: Quite possibly the hardest boss on this list. A large spherical ship piloted by an alien who can be seen in the cockpit. It also sports large claws attached to it and retractable weapons on the ship itself. It can teleport in random areas, fire missiles from it’s ship, shoot spikes faster than other bosses, shoot walls at you, shoot lasers with it’s claws, and shoot a HUGE laser from it’s core. To beat it, you destroy the claws first, then you destroy the core (which has a very, very, VERY large amount of health) where it will then malfunction and explode before falling to it’s destruction at the bottom of the forge, rewarding you with a big shard and three legendary gun parts to choose from.
Gamemodes-
God Mode: Exactly what it sounds like. Obtained at 100000 (was thinking about 1 million but decided it was too overpriced) purple shards and once at least 150 (or more if you want) gun parts have been obtained. Makes the player completely invincible. Does NOT give players purple shards (unless you want it to) but it can give unobtained gun parts that were collected during any God Mode runs. Can also be used in custom mode when unlocked.
ridiculous Mode: A game mode where a ridiculous amount of hard enemies spawn, and the player only gets weak weapons. Also, the player doesn’t get shop rooms, armor rooms, question mark rooms, keys, shields, neutralize, deflect, upgrade rooms, health rooms, or max health rooms, and all of the rooms are challenge rooms. The player also starts with a max health of one, deals 50% less damage. The enemies have 200% more health, move 100% faster if they can move, have a 300% higher firerate, have the capacity of how many can exist at a time increased by 1000%, and spawn 500% faster. Also forces the player to do the secret zone after defeating the core. Unlocked when Nightmare Mode is beaten 5 times, and has a description of: “So you thought Nightmare Mode was easy? Well then, you tryhard, this is the place for you.”
Free Movement mode: Basically a regular game except for one thing: YOU CAN MOVE AROUND THE ARENA AND JUMP. Probably will use different maps if this is added. Not sure what to make this cost in purple shards. Could be added to custom mode if it gets added to the game. It’s ok if this doesn’t added to the game: I just thought it would be a cool idea.
If you are some random guy who read this, then you may look upon this freely. If you are any one of the devs of this game and you read this, I would really appreciate it if you added any of these things to the game. You don’t have to add all of these to the game, of course, but if you do add any of these, I won’t mind if you change anything around if you do decide to add these to the game, as long as you don’t change too much. I may update this from time to time if I get more ideas. Made by a guy who wants to share his imagination with the world. Also, I found a glitch where you can put a shield (not sure about anything else) on your left hand connected when you already have a connector (dice connector is the only one I tried) on your left hand. It didn’t seem to work on my right hand connector, and I also found it on total accident.
I love this game. Just wish you could start over with the guns you've saved as favorites. Easy to dive into and hours of fun!
Cool
I absolutely love this game. The crazy guns that you can make is so much fun. Each time you play it’s different. Doesn’t get boring. I just don’t understand why you can favorite a gun you made but can’t use it again. I am playing in co op.
very great game but one thing I don’t like about it. It takes forever for me to join the lobby with people.